Last Updated on August 24, 2026 by Umar Farooq
Almost every guide to finding damp gives you a list of symptoms. Very few give you a test, and the ones that do usually leave out the duration, the threshold, or half the result.
One page that ranks well for this describes taping foil to the wall, then tells you only what dry foil means. It never says what wet foil on the room-facing side means, which is the half that identifies condensation.
Below are five tests. Each has a procedure, a length of time, and both branches of the answer. They are ordered so the free ones come first.
Before you test: what you are choosing between
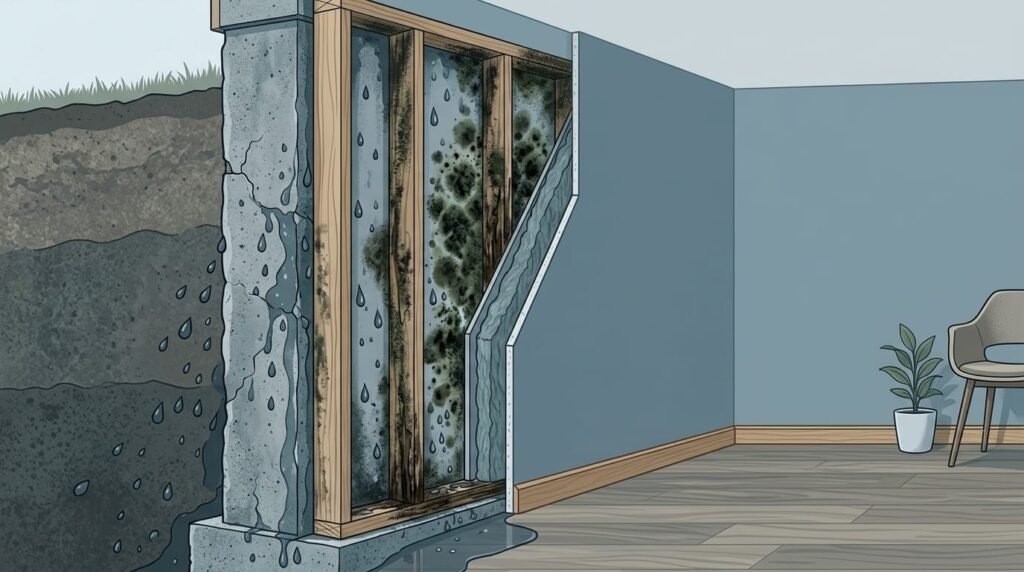
Moisture reaches a basement by four routes, and they need different fixes.
| Route | What it looks like |
|---|---|
| Bulk water | Liquid arriving through a crack, a joint, a window well. Usually tied to rain. |
| Capillary suction | Moisture drawn through masonry or a slab from wet ground. Slow, constant, no rain correlation. |
| Vapour diffusion | Moisture moving through the material as a gas. Constant, invisible, worst without a vapour barrier. |
| Air transport | Humid air carrying moisture onto cold surfaces, where it condenses. Weather-driven, usually summer. |
Test 1 — Rule out your own plumbing (2 hours, free)
Do this first because it is the cheapest thing to eliminate and it needs no equipment.
- Turn off every water-using fixture and appliance.
- Read the water meter, or note the leak indicator dial.
- Wait two hours with no water use.
- Read it again.
| Result | What it means | Next step |
|---|---|---|
| Meter moved | Water is escaping on the pressurised side | Shut the main valve and re-check. Stops = leak inside. Keeps running = leak between meter and house. |
| Meter did not move | No supply leak | Move to Test 2. Note this does not clear a drain or waste leak, because those are not pressurised. |
Test 2 — The sheet test (16–24 hours, pennies)
This is the test that separates water coming through the structure from water coming out of the air. It is the consumer version of a recognised standard method for detecting moisture movement in concrete.
- Pick the damp area. Wipe the surface and let it dry as far as it will.
- Tape an 18 inch square of clear plastic sheet or foil flat against it.
- Seal all four edges with wide tape. An unsealed edge invalidates the test.
- Leave it at least 16 hours. Twenty-four is better.
- Peel one corner back and inspect both faces of the sheet and the surface underneath.
| What you find | What it means |
|---|---|
| Moisture on the face against the wall, or the surface beneath is damp | Moisture is coming through the structure. Capillary or bulk water. |
| Moisture on the room-facing side | Condensation. The moisture is in your air, not your wall. |
| Both faces damp | Both are happening. Humidity work alone will not be enough. |
| Neither — everything dry | Nothing was active during the test window. Repeat after heavy rain, or during the most humid weather you get. A dry result is not a clean bill of health. |
Test 3 — Dew point against surface temperature (20 minutes)
This is the only test that positively proves condensation rather than inferring it. You need a hygrometer and an infrared thermometer, both cheap.
- Measure air temperature and relative humidity in the room.
- Convert those to a dew point. Any dew point calculator will do it, and the Department of Energy publishes a free one.
- Measure the temperature of the coldest surface you can find. Usually the wall low down, a corner, or a cold pipe.
- Compare.
| Result | What it means |
|---|---|
| Surface is at or below the dew point | Condensation is forming there. This is not an opinion, it is physics. |
| Surface is comfortably above the dew point | Condensation is not the mechanism. Look at Tests 1, 2 and 5. |
Test 4 — Log it for two weeks (the one nobody mentions)
This is the largest gap in every guide on this subject, and it is the method the building research establishment names as the most effective:
Cheap logging hygrometers make this a homeowner test. Put one in the basement, one upstairs, and one outside. Leave them a fortnight. Then look at what moves together.
- Basement humidity rising when outdoor humidity rises, with no rain, means air transport. You are ventilating moisture in.
- Basement humidity rising a day or two after rainfall means water is getting into the ground and then the structure.
- Basement humidity flat and high regardless of weather means a constant source. A slab without a vapour barrier, or a leak.
- Basement surfaces below the dew point at the same times each day points to a thermal problem rather than a water one.
A single site visit gives you one data point. A fortnight of logging gives you a pattern, and the pattern is the diagnosis. It also costs less than an inspection.
Test 5 — Hose testing, done the right way round
If Tests 1 to 4 point at water entering from outside, this locates where. Most guidance on it is backwards.
Contractor advice usually says to start at the top of a wall and work down. Professional water-testing guidance says the opposite: test the lowest area first. The reason is that starting at the bottom removes the ambiguity that arises when water runs down the face of the wall from a higher test and appears at a lower point.
- Have someone inside watching, with a phone, in the dark with a torch.
- Start at the lowest section of one wall only.
- Run water on that section alone. Standardised facade testing works to roughly one minute per linear foot, which is a more defensible basis than the fifteen to twenty minutes contractors usually quote.
- If nothing appears, move up one section. Same wall.
- Only when a whole wall is clear should you move to the next one.
- Stop the moment water appears inside and note exactly where.
Two conditions matter. Do not do this on frozen ground, and do not do it during or straight after rain, because you will not know which water you are looking at.
What a moisture meter is and is not telling you
Meters are useful for finding where to look. They are not useful as a number.
On anything other than timber, an electrical resistance meter reports a wood moisture equivalent. It is a comparison, not a percentage of water in your wall. Dissolved salts in masonry conduct electricity, so a salt-contaminated wall reads high even when it is dry. Building research guidance notes that meters “can lead to misdiagnosis” depending on the building, materials and history.
You will find pages publishing absolute thresholds for masonry, along the lines of “concrete 2 to 4 percent” or “above 20 percent is a problem”. Those numbers come from timber scales and do not mean anything on a basement wall.
Use the meter comparatively. Read a part of the wall you know is dry, then read the suspect area, and pay attention to the difference rather than the figure.
And thermal cameras
A thermal camera shows surface temperature. Damp areas often read cooler because evaporation cools them, so the camera can find where to investigate. It cannot tell you how wet something is.
Peer-reviewed testing puts this plainly: infrared identifies areas of high moisture content but does not quantify them, because the same temperature difference can correspond to both high and low moisture. The same work notes there are no technical standards for using infrared to detect moisture at all.
Two practical limits. It works best in warm dry air and worst in a cold humid basement, which is the condition you are testing in. And it will not find a leak that happens to be dry on the day you scan.
The order to work in
Deal with obvious defects first, then monitor, then reassess before spending on treatment. That staged approach is what professional guidance actually requires, and it is the opposite of a same-day diagnosis ending in a quote.
- Rule out interior sources. Water meter test, unvented dryer, drying laundry indoors, uncovered sump.
- Run the sheet test and the dew point check. Two days, almost no money. These decide whether you are dealing with air or water.
- Fix the free things outside. Gutters, downspout extensions, ground slope. Building science guidance on basements reduces to drain the site and drain the ground.
- Log for a fortnight and see whether the pattern changed.
- Only then hose test to locate a specific entry point, and price repairs against what you found.
The stop condition matters as much as the steps. If the humidity pattern flattens out after you fix the gutters, you are finished. Carry on testing only while something is still unexplained.
Two things worth knowing about advice you will be given
Government guidance on damp is explicit that “simply removing surface mould will not prevent the damp and mould from reappearing”, and equally explicit that blaming the problem on how occupants live is unreasonable. If somebody tells you the answer is to open windows and stop drying washing indoors, that is a partial answer at best.
The second is about interior coatings. Sealing the inside face of a basement wall is widely recommended and often makes things worse, because impermeable interior finishes stop the wall drying inward. The moisture does not leave. It goes somewhere else.
FAQ
The tests all came back dry but the basement still smells damp. Now what?
Repeat them in different weather. A sheet test in a dry spell proves nothing. If they stay dry across a humid week and a wet week, the smell is probably residual in porous material rather than an active source.
Do I need a professional damp survey?
Not to answer the questions above. What a survey adds is sampling and interpretation for a wall you cannot resolve yourself. Ask what tests will be run and over what period before you agree to one.
Can I just use a mould test kit?
It will not tell you where the water is coming from, which is the only question that matters here. Spend the money on a hygrometer and a data logger instead.
How long should the whole process take?
Two days for Tests 1 to 3, then a fortnight of logging. Rushing it is how people end up paying for the wrong repair.
What if two things are happening at once?
Common, and the sheet test will show it as both faces damp. Fix the water entry first, then reassess the humidity, because entry raises humidity and can make condensation look like the primary problem.